Thursday, December 13, 2012

Interact Intranet: Automate the Extraction of Binary Profile Pictures for use in Active Directory

Active Directory can be used as a central repository for the storage of profile pictures.  This source can then feed email, CRM, intranets, messaging and other enterprise software.

Unfortunately, there isn't an out of the box way for users to add these photos directly to Active Directory (as far as I'm aware!) so some trickery needs to happen to get this all to work.

This blog post will explain how we extract user profile pictures from our Interact Intranet environment and then upload them to Active Directory.


Step 1: SQL query to identify users and their pictures

Microsoft recommends square profile pictures with dimensions of 96x96.  Interact conveniently already thumbnails pictures into preset sizes.  After testing, we found that their 4th size, 75px width, has sufficient clarity when used in Active Directory, which allows us to export pictures without the need for programatic image manipulation.  Note: If you do want to investigate image manipulation you might start with a library like ImageMagick.
select PERSON.NTUsername, ASSET_INSTANCE.BinaryData
from PERSON
INNER JOIN ASSET_INSTANCE
on PERSON.AssetID=ASSET_INSTANCE.AssetID
Where PERSON.NTUsername != 'ARCHIVED'
and PERSON.AssetID is not NULL
and AssetSize='4' 

Step 2: Export pictures to a file path

Below is the code that is triggered though a nightly job to extract the binary data from the database and convert it into files at the designed path.
Credit for this code, and pulling this project together, comes from coding ninja extraordinaire Matt Chiste from Integryst who was able to complete the development in less time than it took me to write the requirements!
using System;
using System.Collections.Generic;
using System.Linq;
using System.Text;
using System.Data.SqlClient;
using System.Data;
using System.IO;
namespace PicExporter
{
    class Program
    {
        static string connString = "Data Source=<redacted>;Initial Catalog=<redacted>;Persist Security Info=True;User ID=<redacted>;Password=<redacted>";
        static string cmdString = "select PERSON.NTUsername, ASSET_INSTANCE.BinaryData from PERSON INNER JOIN ASSET_INSTANCE on PERSON.AssetID=ASSET_INSTANCE.AssetID Where PERSON.NTUsername != 'ARCHIVED' and PERSON.AssetID is not NULL and AssetSize='4'";
        static string folder = "pics/";
        static string FILENAME_EXTENSION = ".jpg";
        static int FILENAME_INDEX = 0;
        static int BINARY_INDEX = 1;
        static string PROP_FILE = "picexporter.properties";
        static void Main(string[] args)
        {
            Console.Out.WriteLine("START: " + DateTime.Now.ToString());
            // vars
            string filename;
            loadVars();
            // set up the connection
            SqlConnection conn = new SqlConnection(connString);
            SqlCommand cmd = new SqlCommand();
            SqlDataReader rdr=null;
            try
            {
                // run the command
                conn.Open();
                cmd.Connection = conn;
                cmd.Parameters.Clear();
                cmd.CommandType = CommandType.Text;
                cmd.CommandText = cmdString;
                rdr = cmd.ExecuteReader();
                // iterate the users
                while (rdr.Read())
                {
                    // write to the log
                    Console.Out.Write("Extracting user: " + rdr[FILENAME_INDEX].ToString());
                    // get the byte array for the image
                    Byte[] b = new Byte[(rdr.GetBytes(BINARY_INDEX, 0, null, 0, int.MaxValue))];
                    rdr.GetBytes(BINARY_INDEX, 0, b, 0, b.Length);
                    // write rest of line to the log
                    Console.Out.Write(" (" + b.Length + "bytes)");
                    // check existing file
                    filename = folder + rdr[FILENAME_INDEX].ToString() + FILENAME_EXTENSION;
                    if (File.Exists(filename))
                        Console.Out.Write(" [UPDATE]" + Environment.NewLine);
                    else
                        Console.Out.Write(" [NEW]" + Environment.NewLine);
                    // user names prefixed with the domain will have a \ in them.  Need to make sure the full folder path is created
                    if (!Directory.Exists(Path.GetDirectoryName(filename)))
                    {
                        Console.WriteLine("Creating Folder: " + Path.GetDirectoryName(filename));
                        Directory.CreateDirectory(Path.GetDirectoryName(filename));
                    }
                    // write the file
                    FileStream fs = new FileStream(filename, FileMode.Create, FileAccess.Write);
                    fs.Write(b, 0, b.Length);
                    fs.Close();
                }
            }
            catch (Exception ex)
            {
                Console.Out.WriteLine("EXCEPTION: " + ex.Message);
                Console.Error.WriteLine("EXCEPTION: " + ex.Message);
            }
            finally {
                // close the connections
                if (rdr != null)
                    rdr.Close();
                if (conn != null)
                    conn.Close();
            }
            Console.Out.WriteLine("FINISH: " + DateTime.Now.ToString());
        }
        static void loadVars()
        {
            string propFile = Directory.GetCurrentDirectory() + "\\" + PROP_FILE;
            string line, name, value;
            StreamReader file = null;
            // Read the file line by line
            try
            {
                file = new System.IO.StreamReader(propFile);
                while ((line = file.ReadLine()) != null)
                {
                    try
                    {
                        name = (line.Substring(0, line.IndexOf('=')));
                        value = (line.Substring(line.IndexOf('=')+1));
                        if (name == "connString")
                            connString = value;
                        else if (name == "cmdString")
                            cmdString = value;
                        else if (name == "folder")
                        {
                            folder = value;
                            if (!Directory.Exists(folder))
                            {
                                Console.WriteLine("Creating Folder: " + folder);
                                Directory.CreateDirectory(folder);
                            }
                        }
//                        else
//                            Console.WriteLine("ignoring property: name: " + name + ", val: " + value);
                    }
                    catch (Exception)
                    {
                        // ignore line without "="
//                        Console.WriteLine("ignoring line: " + line);
                    }
                }
            }
            catch (Exception ex)
            {
                Console.Out.WriteLine("ERROR READING " + propFile + ": " + ex.Message);
                Console.Error.WriteLine("ERROR READING " + propFile + ": " + ex.Message);
            }
            finally
            {
                if (file != null)
                    file.Close();
            }
        }
    }
}
Reference: http://support.microsoft.com/kb/317016

Step 3: Import pictures to Active Directory

The following powershell script runs through a scheduled job.  The job searches the folder we have extracted photos to for newly modified photos and then calls the script, which matches the filename of the photo to the network User Name and then uses native Active Directory APIs to add the image to the user’s profile.
param($Identity,$Path);
# Import a .jpg into Active Directory for use as the Exchange/Outlook GAL Photo
# For best resultsL <10kb files, 96x96 dimensions
Add-PSSnapin Microsoft.Exchange.Management.PowerShell.Admin
if (!$Identity)
{
    throw "Identity Missing";
}
if (!$Path)
{
    throw "Path Missing";
}
if (!(Get-Command Get-User))
{
    throw "Exchange Management Shell not loaded";
}
$User = Get-User $Identity -ErrorAction SilentlyContinue
if (!$User)
{
    throw "User $($Identity) not found";
}
if (!(Test-Path -Path $Path))
{
    throw "File $($Path) not found";
}
$FileData = [Byte[]]$(Get-Content -Path $Path -Encoding Byte -ReadCount 0);
if($FileData.Count -gt 10240)
{
    throw "File size must be less than 10K";
}
$adsiUser = [ADSI]"LDAP://$($User.OriginatingServer)/$($User.DistinguishedName)";
$adsiUser.Put("thumbnailPhoto",$FileData);
$adsiUser.SetInfo()

Tuesday, December 4, 2012

Hide Content Based Upon Iframe Parent

Some web sites use iframes to display information from other web servers.  This is a practice that is generally frowned upon yet is a necessary evil sometimes.

I work on an employee intranet where we need to display content from another internal server.  The problem is that sometimes our employees access the site from off of our domain where they don't have access to the internal server.  To get around this issue I've created an extremely simple javascript snippet which can be added to the page to hide the content and display a message to the user explaining why they can't see the content.

I'm posting it here as a reference for myself and in case someone out there needs something like this!


<div id="whatever">Your content</div>

<STYLE type=text/css>
   .hidden { display: none; }
</STYLE>

<script type="text/javascript">

   function referrerCheck()
   {
      var mapReferrer = document.referrer;
      var mapDiv = document.getElementById('content');

      if(mapReferrer=="http://this is the URL calling the iframe")
      {
         mapDiv.className='unhidden';
      }else{
         mapDiv.className='hidden';
      }
   }

   referrerCheck();

</script>

How it works:
  1. All of this code goes onto the page which calls the iframe.
  2. The div at the top is where your iframe goes - what you want to hide if folks are off the domain.
  3. The style section sets the stage for what you want to happen if folks are off the domain.  In this case we want to not display the entire div.
  4. The javascript runs the referrerCheck() function which grabs the document.referrer which is the page that calls the iframe.
  5. The getElementById functions gets the div object so that its class can be manipulated.
  6. The If condition then determines whether or not the referrer is on or off domain and sets the class accordingly.

Wednesday, November 28, 2012

Interact Intranet: Alerts

Interact Intranet uses a system of alerts to notify users of certain activities.
Some activities additionally trigger emails (covered in my previous post: Interact Intranet: System emails).

The purpose of this post is my own documentation on what I've learned about the alert system on version 5.1.5.

Manage Alerts

From time to time someone might trigger an alert that administrators would like to remove.
We've removed system emails several times and the process is very straight forward.

Within Site Admin: Control Panel: Manage Alerts you can find and delete alerts.

Be aware that alerts in this area are a combination of future and past alerts.  Meaning some have been sent and others are in the queue to send at a later date.  It would be helpful if there were an indicator for this!  I haven't been able to determine the sort order but they don't appear to display chronologically nor alphabetically.

Advanced Alert Management

Alerts (future and past) are stored in the ALERT table of the Interact database.
Key fields in the table include:

  • DateAdded - date the alert was created
  • DateFor - when the alert is due to be sent
  • Date Actioned - when the Alert has been read by a user (aka actioned)
  • ActionedBy - which user the alert has been actioned by

Alert SubType IDs

Alert subtype ID's are used to help organize alerts by activity in the database.
After over 10k alerts being sent by our system (1 month of production use) these are the IDs that have triggered alerts for us and their titles:
  • 1 New Blog Post
  • 2 Keyword Suggestion
  • 2 You have received a comment on one of your blog postings
  • 3 Is This Up To Date?
  • 7 Document Version Approved
  • 8 Comment Reported
  • 8 Post Notification
  • 8 Thread Notification
  • 8 Thread/Post Content Reported
  • 9 <Title of document pending approval>
  • 10 Document Review Reminder
  • 12 Document Expiry Warning
  • 13 Document Watch
  • 14 Document Comment Received
  • 17 An update has been scheduled
  • 18 Interest Suggestion
  • 19 Feed Notification
  • 20 <Username> has invite you to join <team name>
  • 22 Share Notification
  • 23 A comment has been made about your image.
  • 200 You have been tagged
A number of alerts have null as their SubTypeID.  Those include:
  • {TEAMNAME} Notification.
  • Accepted Interest Suggestion
  • <Username> has requested to join <team name>.
  • Approval Request Deleted
  • Comment Request Deleted
  • <team Name> Membership (upon being granted access to a team)
  • Rejected Interest Suggestion
  • Team Creation
  • Team Request

Note

AFAIK alerts (and emails) are triggered by actions of others and can't be self-triggered.
This needs more testing on my end to validate this behavior.

Tuesday, November 27, 2012

Interact Intranet: Customizing your login page

Modifying your Interact login page is easy to do, although probably not upgrade proof.  If you are going to make any customizations, be smart and make a backup of your customizations (in addition to the originals)!


The source files for the login page are stored at \Interact\WEB\Interact\Login.  From there you can modify the default.aspx and default.aspx.vb files per your design.  The CSS is quite complex so if you aren't strong at manipulating floats properties in DIVs then you might just want to start from scratch (or delete everything between the BODY tags).

With some graphic help from our creative department I was able to whip this up in about an hour.
Good luck!

Thursday, November 8, 2012

Interact Intranet release version 5.2 with enhanced analytics and more

This morning (US time) Interact Intranet hosted a webinar covering the release of version 5.2 of their intranet software.  The webinar was recorded and is available here.  Below are some comments and screenshots of the features.

Comments Interface

Anyone that has the ability edit a document can now delete comments.
Profile pictures display alongside comments.


Change Author

In bulk - reassign a document to someone else.


Influence Score

Displays profile score and influence score on user profile
Measures how each user causes others to take action on the Intranet


Analytics

Statistics


Warnings


Real Time Benchmarking

If you don't opt in you don't see the scores for other companies.
All benchmarked against entire Interact user population


Email Report

Daily emails.  Content and frequency cannot be customized.


Document Quality

Score out of 10
Based on things like: keywords, title, images, review date, links, summary, content, etc
Updates on creation and edit of a document.


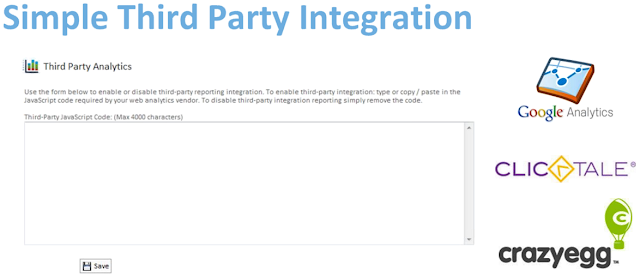
3rd Party Analytics Integration

Using this interface you can apply a 3rd party analytics tool.


How do I get 5.2

You need to request it from support area via the Interact Extranet area.  Raise a new ticket
5.2 is available immediately.

Tuesday, October 16, 2012

Interact Intranet: Administrative Queries


We are getting close to our go-live date with Interact Intranet and it is time for us to do final cleanup to ensure our site is as consistent as possible.  To supplement the out of the box metrics I created a post of document queries, and this post of queries is going to focus on content structure and organization.

Absolute vs Relative Links

If you have a tendency to link to content (documents, teams, areas, categories, etc) within your intranet you might find that some of your links are absolute and others are relative.  This becomes an issue if you use different URLs for intranet, extranet or outside users. Use this query to verify that all of your links are relative:
SELECT SECTION.Title, SECTION2.Title as Parent, SMI.URL from SECTION_PROPERTIES_SIDEMENUITEM as SMI
INNER JOIN SECTION
on SECTION.SectionID=SMI.SectionID
INNER JOIN SECTION as SECTION2
on SECTION.ParentID=SECTION2.SectionID
WHERE SMI.URL like 'http://%'

Links Specify Page Format

If you create links within your intranet to other areas you might find that some of your links were created using a URL which specifies formatting.  All links which aim at Section/Main should use the default.aspx as opposed to using a defined .aspx page such as MainTwoColumnsLeft MainOneColumnLeft, etc.  You can verify that your site is clean by using this query:
SELECT SECTION.Title, SECTION2.Title as Parent, SMI.URL  FROM SECTION_PROPERTIES_SIDEMENUITEM as SMI
INNER JOIN SECTION
on SECTION.SectionID=SMI.SectionID
INNER JOIN SECTION as SECTION2
on SECTION.ParentID=SECTION2.SectionID
WHERE SMI.URL like '/Interact/Pages/Section/Main%'
ORDER BY Parent

Inconsistent Links

If you create links on multiple areas pointing to the same piece of content you might find that some of your links aren't consistent.  You can verify that your links are consistent using this query and swapping out Expense and Award for your commonly used link titles:
SELECT SECTION.Title, SECTION2.Title as Parent, SMI.URL from SECTION
INNER JOIN SECTION_PROPERTIES_SIDEMENUITEM as SMI
on SECTION.SectionID=SMI.SectionID
INNER JOIN SECTION as SECTION2
on SECTION.ParentID=SECTION2.SectionID
WHERE SECTION.TypeID='3' and (SECTION.Title like 'Expense%' OR SECTION.Title like 'Award%')
ORDER BY SECTION.Title

Inconsistent Category Options

Within a category there are a series of options which can be set including things like sort order.  If you have a large intranet and you deviate from the defaults you might want to verify that your categories are somewhat consistent.  You can access the consistency of your categories using this query and swapping out the red text with however you've set your default options:
SELECT SECTION2.Title as Parent, SECTION.Title, SMI.ShowAuthor, SMI.DefaultOrdering, SMI.ShowPerPage, SMI.TemplateID FROM SECTION
INNER JOIN SECTION_PROPERTIES_SIDEMENUITEM as SMI
on SECTION.SectionID = SMI.SectionID
INNER JOIN SECTION as SECTION2
on SECTION.ParentID=SECTION2.SectionID
WHERE SECTION.TypeID='3' and SMI.TypeID='1' and (SMI.ShowAuthor!=1 or SMI.DefaultOrdering!=1 or SMI.ShowPerPage!=1 or SMI.TemplateID!=1)

What Categories Are Empty

Curious what categories on your site don't have any documents?
Sections >1790 (on my site) are admin and modules areas which is why I eliminated them.
SELECT SECTION.sectionID, Section2.Title as Parent, SECTION.Title FROM SECTION
INNER JOIN SECTION as section2
on SECTION.ParentID=section2.SectionID
WHERE SECTION.SectionID>'1790' and SECTION.Title not like ('%Home') and SECTION.TypeID='3'
and NOT EXISTS
(SELECT * FROM CONTENT_SECTION WHERE SECTION.SectionID=CONTENT_SECTION.SectionID)
ORDER BY Parent asc

User Last Login

Curious which users haven't logged into your site in the last few days, weeks months? This query will show the last time all users in your system logged in.
SELECT Surname, Firstname, DateLastAccessed from PERSON
ORDER BY DateLastAccessed desc

I'll continue to add to this list as I generate additional queries.  Feel free to lob out any suggestions for queries and I'll see if I can add them to the list.

Thursday, October 11, 2012

Interact Intranet: Noise Words


To improve processing time for search queries it is common for applications and databases to ignore certain words which have low value.  SQL Server has it's own list of noise words which you can edit and change.
Interact also has a list however I've been told they are hard-coded into the system and not customizable.
Here is the list of Interact's noise words:

1 2 3 4 5 6 7 8 9 0 a b c d e f g h i j k l m n o p q r s t u v w x y z not about after all also an and another any are as at be because been before being between both but by came can come could did do each for from get got has had he have her here him himself his how if in into is it like make many me might more most much must my never now of on only or other our out over said same see should since some still such take than that the their them then there these they this those through to too under up very was way we well were what where which while who with would you your & ? use

Curiously if you look at the Interact database you'll notice there is a table called NoiseWords which has a single, unpopulated, column called WRD.

Reference (login required): http://extranet.interact-intranet.com/Interact/Pages/Content/Document.aspx?id=4609

Friday, September 21, 2012

Configuring MS RoboCopy to schedule ongoing synchronization of files between servers

Robocopy is a utility to copy directories from one server to another.  Commands to use the tool are fairly straightforward and can be added to a batch file to run based on a schedule.

We recently encountered a situation where we needed to sync various files from one server to another on an on-going basis.  To do that we create a folder on the root of our origination server and called it Robocopy.
Within that folder we created a copy.bat file with a very simple argument following the command structure of:
robocopy <Source> <Destination>

Our command specifically says: 
robocopy c:\myFolder \\extranet\c$\myFolder /MIR /LOG+:robo.log
This essentially is saying take everything from the C:\myFolder folder and copy it to the \\extranet server's C:\myFolderfolder.

The /MIR command mirrors a directory tree and the /LOG command tells it to writes the status output to the log file (appends the output to the existing log file).

Schedule the File to Run

In Windows Server 2008 the process of scheduling a batch or job to run is extremely simple.  Just open your Task Scheduler and create a task.  The action in this case is to start a program and then point the path to the .bat file that was created.  That is it!

Thursday, September 20, 2012

Interact Intranet: Expanding your content - literally

Content pages in Interact Intranet are made up of 3 zones.
  1. Side navigation
  2. Content
  3. Options (Author, rating, etc.)
The 3rd zone occupies valuable real estate and displays regardless of whether any Options are enabled.
Occasionally you may find yourself not wanting to use any options and wishing you could extend your content into zone 3.  Luckily that is possible and is extremely easy to do on a content by content basis.
The width of the 2nd zone is fixed using the CSS width property of .DocumentContentsHTML.
Within your web page document you can add some inline CSS styling to override this property and move from a 3 zone layout to a 2 zone layout as shown in the pictures below.

The code to override this element would look like this:
<STYLE type=text/css>
    .DocumentContentsHTML{width:750px;}
</STYLE>


Caveat: This was done in 5.1.4 and it is possible that future upgrades might overwrite a modification like this.

Tuesday, September 18, 2012

Interact Intranet: Modifying web page templates

When you create a document in Interact Intranet you have the option of building your own web page.  If you choose to build your own web page you are presented with a series of templates, formatted HTML, to make your content more attractive.

The default template displays a large image on the left side of the page.  There is a blank template (no formatting) however a user would need to select it from the dropdown.  As we are undergoing a content migration of thousands of documents we are encouraging our users to transfer content from files to web content.  Despite training we are finding that many of our content managers are neglecting to change the template and are confused by the default templates appearance.

To rectify this problem I look into the Interact database to see how it is handling templates.  Sure enough, there is a CONTENT_TEMPLATE table which includes everything you would need to modify your templates (title, summary, source code, affiliated css file, grouping, active and the ability to modify the order).

Since my goal is to simply adjust the default template and order of the other templates there are only a few fields that concern me:


Within the template dropdown above you can see the impact of the TemplateGroup field where some fall into Standard and other into Smart.  By changing a few 1's to 2's in that field, and modifying the OrderBy field I've been able to modify the Template dropdown to have a new default and appear like this:


The Active field is boolean and my testing showed that setting templates to False (0) hides templates as you'd expect.  I didn't bother attempting to change the source code of the templates which is stored in the source field although it looks straightforward.


Caveat: This was done in 5.1.4 and it is possible that future upgrades might overwrite a modification like this.

Monday, September 17, 2012

Interact Intranet: Document Types and Content Queries

We are going through a migration effort from our old intranet (Plumtree) to Interact Intranet.  In doing so we'd like to track a few things that aren't available from the out of the box statistics tool.  Fortunately the database shows that quite a lot of data is being tracked so in this post I'll write about the queries that I run to help us track our content.


Document Types

There are 7 documents types in the system:
  • 10 - web based document
  • 20 - document: link to something?
  • 30 - document: link to something?
  • 40 - document: upload a document (file)
  • 50 - document: link to something on the network
  • 100 - discussion forum threads, and for each document that has a comment section it also gets an entry in this table
  • 110 - this is the catch all document type which makes it awkward to identify specific content types.  Type 110 includes: discussion forums posts, document comments, and activity wall posts (among others I'm sure!)

Important Queries (for me to remember)

who has submitted the most content

    • in the system
      SELECT COUNT(CONTENT.AddedBy) as Count, PERSON.Firstname, PERSON.Surname
        FROM CONTENT
        INNER JOIN PERSON
        ON CONTENT.AddedBy=PERSON.PersonID
        WHERE CONTENT.TYPEID in ('40','10')
        GROUP BY CONTENT.AddedBy, PERSON.Surname, PERSON.Firstname
        ORDER BY COUNT(CONTENT.AddedBy) DESC


    • in each area
      SELECT SECTION.Title as Area, COUNT(CONTENT.AddedBy) as Count, PERSON.Firstname, PERSON.Surname
        FROM CONTENT
        INNER JOIN PERSON
        ON CONTENT.AddedBy=PERSON.PersonID
         INNER JOIN SECTION
        ON SECTION.SectionID=CONTENT.SectionID
        WHERE CONTENT.TYPEID in ('40','10')
        GROUP BY CONTENT.AddedBy, PERSON.Surname, PERSON.Firstname, SECTION.title, CONTENT.SectionID
        ORDER BY COUNT(CONTENT.AddedBy) DESC


how many documents are file based and how many are web pages

    • in the system
      SELECT CONTENT.TYPEID, COUNT(*) as Count
        FROM CONTENT
        Where CONTENT.TypeID in ('40', '10')
        Group BY CONTENT.TypeID


      If you are curious about the other types of documents you could run a query like this to see the count for each different type:
        SELECT TYPEID, COUNT(*) as Count
            FROM CONTENT
            GROUP BY TypeID

      NOTE: If you look at Interact Site Statistics "Size of Intranet" that seems to reflect the majority of what is shown here.  I have a 10 item discrepancy between the sum at this point, so perhaps 110, 50 and 30 aren't included in that number.

how many documents have been added

    • to the system
      SELECT COUNT(*) as Count
        FROM CONTENT
        Where CONTENT.TypeID in ('40', '10')
    • to each area/section
      SELECT SECTION.Title, COUNT(*)
        FROM CONTENT
        INNER JOIN SECTION
        ON SECTION.SectionID=CONTENT.SectionID
        WHERE CONTENT.TypeID in ('40','10')
        GROUP BY SECTION.Title
        ORDER BY SECTION.Title


Thursday, September 13, 2012

Interact Intranet: Mapping Active Directory fields

Every Interact customer that uses an Active Directory repository will at one time or another need to create and map fields.  The process can be tricky, so the purpose of this blog is to provide instructions on how to accomplish this task and some tips to help along the way. (note: this is done on 5.1.3 and the process might be different on other versions)

This diagram illustrates the relationship between the mapping steps detailed further below.

Fields

Three different fields need to be created for this process.
  1. Profile field
    These fields are tied to user profiles, although you have the option on whether or not to display the data.
  2. Active directory field
    This is behind the scenes field that users will never see.  Title it in a manner that will be intuitive to your Administrators.
  3. Mapping field
    This is behind the scenes field that users will never see.  Title it in a manner that will be intuitive to your Administrators.  Not only does the name of this field appear as the mapping field, but also within the mapping table (in the step Mapping Your Fields Together below)

Naming Conventions 

I would recommend developing a naming convention to prevent confusion between these fields. Because they organize alphabetically a prefix would help keep fields of the same type together.
  1. Profile field:
    Employee Type
  2. AD field:
    AD Employee Type
  3. Mapping field:
    Map Employee Type

Creating Fields

Profile field

    1. Navigate to: Site Admin-> Manage People-> Manage Additional Fields
    2. Click the New Field button and fill in the following information:
      • Title
      • Additional Field Type
        • Once created this field is no longer editable
      • Number of Rows
        • Sets the size of the text-box field
      • Icon
      • Apply To (Staff/Contacts)
      • Display on Profile
      • Allow User Edit
        • Regardless of how you set this, an admin can always override this field, even if it is mapped against AD, however each time AD syncs your changes will be overwritten
      • Available To
        • Restrict who can see the information (All, User, Manager, User & Manager)
    3. Once created the new field will appear in the Additional Fields section of the edit profile area
    4. Fields will not appear on a public profile unless they contain data

    Mapping field

    WARNING
    Be extremely careful with these fields. Once created they cannot be edited nor deleted.

      1. Navigate to: Site Admin-> Manage People-> Active Directory Sync
      2. Select your domain
      3. From the Options dropdown select Manage Field Mappings
      4. From the Options dropdown select Manage Fields
      5. Click the Add Field button and fill in the following information:
        • Field Type: Additional Field
        • Title
        • Additional Field
          • This maps against the Profile field
        • Description
      6. Click the Save button

    Active Directory field

    WARNING
    Be extremely careful with these fields. Once created they cannot be edited nor deleted.

      1. Navigate to: Site Admin-> Manage People-> Active Directory Sync
      2. Select your domain
      3. From the Options dropdown select Manage Field Mappings
      4. From the Options dropdown select Manage Fields
      5. Click the Add Field button and fill in the following information:
        • Field Type: ACTIVE DIRECTORY
        • Title
        • Field
        • Description
        • Field Size
      6. Click the Save button

    Mapping Your Fields Together

    The 4th and final step in this process is linking your Mapping field to your AD field.  To do this:
    1. Navigate to: Site Admin-> Manage People-> Active Directory Sync
    2. Select your domain
    3. From the Options dropdown select Manage Field Mappings
    4. Click the Add Mapping button and fill in the following information:
      • Interact Field
        • this ties to the Mapping field above
      • Active Directory Field
        • this ties to the Active Directory field
    5. Click the Save button
    Now you can sit back and wait for your Interact instance to synchronize with your Active Directory repository!

    Test

    Now that you've mapped all of these fields you probably don't want to wait for them to sync with AD at 1am or whenever your sync has been scheduled.  You can force your AD sync job to run by going to your front end server, opening the scheduled tasks utility and running it once manually.

     Further Reading (login required)

    Interact covers these steps in: How to Create and Map a New Active Directory Field to a New Interact Field

    Friday, September 7, 2012

    Interact Intranet: Announcements using Keywords


    Interact Intranet provides several options for displaying news/announcements within your site. Below are two that we are considering:

    Document List

    A Document List widget allows you to select content from specific content areas with a lot of flexibility.  As an admin you can select whether or not to display a thumbnail, the number of items to show, how to order them (alpha, or chrono), whether to display the date, summary, etc.  To utilize this type of widget you'd need to set aside a category (content area) specifically for your news items and point the widget there.  Each time someone in your organization needs to post an announcement they would create the item in that folder and it would automatically display.

    Keywords

    Another option for displaying announcements is to use the Keyword Search widget.  This widget is different from the Document List above in that rather than looking at a particular category in your system it instead looks at every document in your system and displays only those that match your keyword criteria.  If someone in your organization needs to post an announcement they can post it wherever the content fits into the taxonomy, and simply by adding a keyword such as home_announcement it will display within this widget.  To take this a step further, you could have multiple Keyword Search widgets on homepages of different areas of your site, for example on the Human Resources home page and make the same announcement appear simultaneously in both by using a second keyword such as HR_announcement.

    Differences

    • Archives
      • All announcements created using the Document List are stored in a particular category, therefore it simplifies showing a full index of items - just link to the category.  For a Keyword Search you could create a link that points to the particular keyword and view the contents as search results.
    • Breadcrumb & Side Navigation
      • The side navigation and breadcrumb of an announcement remain consistent if all documents live in the same category and use the Document List.  When using the Keyword Search each announcement would take you to the corresponding area where the document lives.  To get back to the main announcements they'd need to click on the Home tab again (or the back button) where the Document List option would show a more intuitive Announcement category in the side navigation.  Both approaches require a single click to get back to the list of announcements.
    • Duplication of content
      • Documents can live within multiple categories, however they can only live within a single area.  Therefore if you have an important announcement that relates to content in a particular area of your site you'd need to create it there and additionally create it in your designated announcement category if using the Document List approach.  This is a moot issue when using the Keyword Search because it can pull content from any category so the content would only need to exist once.
    Features Document List widget Keyword Search widget
    Show thumbnail Yes Yes
    Show mini-thumbnail Yes No
    Show author No Yes
    Show date Yes Yes
    Show summary Yes Yes
    Show in 2 columns No Yes
    Control # to display Yes Yes

    Tuesday, September 4, 2012

    Interact Intranet: System Emails

    When undergoing the process of migrating your intranet to a new environment one of the key things you don't want to do is confuse your audience with system generated emails prior to your launch and when you are preparing to launch you need to be able to train your users appropriately and tailor system messages.  To that end, the purpose of this post is to inform folks of what the system generated emails are, how to disable them, and how to modify them.

    List of system generated emails


    Unfortunately an official list of all system generated emails doesn't exist so I've compiled this list based upon random activity I've done on our installation so far.  I'm sure I've missed a few so forgive me if this isn't complete.  Please comment or email me if I need to adjust this list!
    • Documents
      • Document Review Reminder
        • Triggered by: When a document has reached the review date
        • Sent to: Author/Owner of Document
      • Keyword Suggestion
        • Triggered by: a user suggestion a keyword to a document
        • Sent to: the Author/Owner of the document
      • Intranet Document <title>
        • Triggered by: selecting the "Email this Document" link from the Options drop-down within a document
        • Sent to: whoever the user selects as the recipient
      • You have been tagged
        • Triggered by: creating a comment and using the @ tag to identify a particular person
        • Sent to:  Person that was tagged 
        • Note: As of 5.1.3, this feature has a bug in that the link to the corresponding document is relative where it should be absolute.
      • Document Comment Received
        • Triggered by: User leaving a comment on a document
        • Sent to: Document author
      • Document Watch
        • Triggered by: edit of a file
        • Sent to: User that set a watch on a document
      • Comment Reported
        • Triggered by: User reporting a comment on a document
        • Sent to: Document author
      • Is This Up To Date?
        • Triggered by: User completing the "Is this up to date?" option on a document
        • Sent to: Author/Owner of document
    • Teams
      • <user name> has requested that the following team be created:
        • Triggered by: User requesting a team which has been designated as needing approval
        • Sent to: Power Users
      • Your request to create a new team has been rejected by <power user name>
        • Triggered by: Administrator rejection of a requested team
        • Sent to: Requestor
      • {TEAMNAME} Notification.
        • Triggered by: enabling "announcements" in the team activity feed and posting an activity of type "broadcast"
        • Sent to: all team members except the author
      • <team name> Membership
        • Triggered by: 
          • being granted membership
          • having membership revoked
        • Sent to: member who is granted or revoked access
      • <user> has invited you to join <team name>
        • Triggered by: a user inviting you to join a team
        • Sent to: invitee
      • Team Creation
        • Triggered by: the creation of a new team
        • Sent to: the person that created it
    • Profile
      • New Blog Post
        • Triggered by: The creation of a new blog post
        • Sent to: The person subscribed
      • You have received a comment on one of your blog postings
        • Triggered by:  someone adding a comment to a blog post of yours
        • Sent to: blog owner
      • Share Notification
        • Triggered by: someone sharing a document with you
        • Sent to: the person selected in the "share with" area
      • You have been tagged
        • Triggered by: being tagged in someone's news feed
        • Sent to: the person tagged
      • Interact Answers
        • Triggered by: Answers question matching an individual's expertise
        • Sent to: user with matching expertise
      • Feed Notification 
        • Triggered by: 
          • Response to a comment left on another person's news feed
          • Response to an answer left in the QA module
          • Someone posting on your wall
        • Sent to: The person that posts the initial comment
    • Administration
      • Interest Suggestion
        • Triggered by: User suggesting a new interest in the profile area
        • Sent to: System administrators
      • Rejected Interest Suggestion
        • Triggered by: Admin rejecting an Interest Suggestion
        • Sent to: User that made the suggestion
      • ?System Upgrade? (THIS IS AN ALERT ONLY AFAIK)
        • Triggered by: Admin performing a scheduled upgrade and checking the box to notify all users of the downtime.
        • Sent to: Everyone that is logged in at the time?
    • Discussion Forums
      • Thread Notification
        • Triggered by: The creation of a thread
        • Sent to: Subscribed moderators of the discussion forum
      • Post Notification
        • Triggered by: The creation of a post to an existing thread
        • Sent to: Subscribed moderators of the discussion forum
    • Workflow & Forms
      • Intranet Alert
        • Triggered by: Your form being approved
          Sent to: The person who submitted the form in the first place
    • Advanced Document Management Module
      • Document Version Approval Request
        • Triggered by: Version Controlled document pending approval (required Advanced Document Management add-on)
        • Sent to: Designated approver
      • Document Comment Received
        • Triggered by: Version Controlled document receiving a comment (required Advanced Document Management add-on)
        • Sent to: Author/Owner that has requested comments

    Modifying a system generated email's format

    I'm still working on how to change the actual format of the email including things like the subject.  But in the meantime here are some instructions I've received (these are based on our 5.1.3 environment so apologies if the paths aren't the same as what you have).  The areas, in the image below, highlighted in yellow are editable:


     Salutation & Sign-off

    Here are the steps to change these fields:
    1. Navigate on your frontend Interact server to Interact\WEB\Customer\App_Data
    2. There you will find customer specific EN_SystemText.xml which is where the Site Admin GUI interface stores system text
    3. You can amend the generic email message in the following nodes
      • SYSTEXT/INTERACT/PAGES/ALERTS/EXTRAS/EMAIL/SALUTATION
      • SYSTEXT/INTERACT/PAGES/ALERTS/EXTRAS/EMAIL/SIGNOFF
    4. Save the files, go to the Site Admin GUI and select the ‘Re-Sync’ button to clear the cache
    Within the EN_SystemText.xml file this is what the area you'll need to edit looks like:
              <EMAIL>
                <SALUTATION Title="Dear">
                  <HELP Help="" />
                </SALUTATION>
                <SIGNOFF Title="Regards,&lt;br /&gt;&lt;br /&gt;The Intranet Team&lt;br /&gt;&lt;br /&gt;&lt;br /&gt;&lt;span style='font-size:.8em;'&gt;This alert may have already been acted on by someone else. If so then please ignore this. This email is for information only, as such please do not reply.&lt;span&gt;">
                  <HELP Help="" />
                </SIGNOFF>
              </EMAIL>
    You can even enter HTML code into these fields, so if you would like a link to your intranet to always appear in the footer simply add the relevant HTML anchor tag into your footer text.

    Header Image

    In summary:
    1. Navigate to: Site Admin: Control Panel: Manage Application Variables: Global
    2. Change the setting for: Email header image address
      1. Default is: interact/styles/default/core/header.jpg
    If you do not want any banner image at all in the email, simply leave this application variable blank.

    Disabling a system generated email

    I've been told that it isn't possible to block a particular type of system email.

    For more information (Interact extranet login required):

    1. Customizing email alerts
    2. Customize the banner image on email alerts